
Web ADI Stands for Web Application Desktop Integrator
it's a tool that brings Oracle E-Business Suite functionality to a spreadsheet, it is a self-service Oracle application accessed using a browser. Web ADI generates Microsoft Excel on your desktop and uploads the data you have selected to upload.
Let's check out how to create a Web ADI in the Oracle EBS system and the list of components of Oracle Web ADI.
List of components involved in the creation of Oracle WebADI
- Create Integrator
- Define Layout
- Define Mapping
- Define Parameter
- Manage Component
In this post, I will be showing you all how to create an Integrator
Creating Integrator involves the below steps.
Step-1: Create Integrator
Step-2: Create Interface
Step-3: Create Contents
Step-4: Create Uploader
Step-5: Create Importer
Step-2: Create Interface
Step-3: Create Contents
Step-4: Create Uploader
Step-5: Create Importer
Step-1: Create Integrator
Follow the below steps to Create Integrator
→ Log in to Oracle Applications
→ Assign below responsibilities
→ Desktop Integration Manager
→ Desktop Integrator
→ Oracle Web ADI
→ Goto Desktop Integration Manager responsibility, and click on “Create Integrator”.

→ Provide the following information as shown in the below screenshot.
* Integrator Name: <Enter Integrator name>
* Internal Name: <Enter 8 Chars name in caps ex: ABCDEFGH>
* Application: <Give Application top>
* Enabled: Yes
* Check the “Display in Create Document Page”

After providing all the information shown
above click on next button and follow the steps mentioned in Create Interface.
→Enter the below details in Interface creation page
* Interface Name: <Give Interface Name>
* Interface Type: API Procedure
* Package Name: <Give Package Name>
* Procedure/Function Name: <Give Procedure or Function Name>
* API Returns: FND Message Code
Click on Apply then it will go Contents page

Step-3: Create Contents
→Keep the content type as None, If you want to download the data while loading the WebADI to desktop then you can give the content type SQL Query or any other option available in Content-Type.
→Note: To check how to give the Content-Type as SQL please check out this page

Step-4: Create Uploader
→Select the Form Template from the Uploader pop-list and click on create.
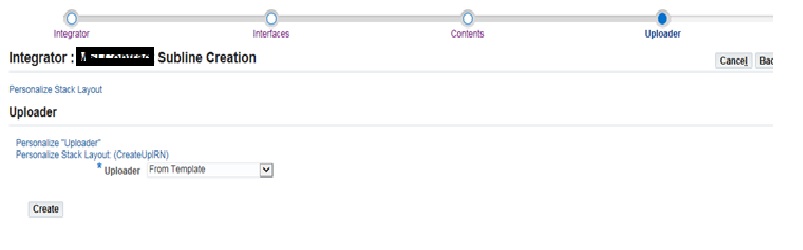
→After clicking on the Create Button, The page will look like below, provide the following information.
Uploader Name: <Give Uploader Name>
Uncheck the BNEValidation and BNECommitrows as shown in the below screenshot and click on the Next button.

Step-5: Create Importer
→Select Importer Type as PLSQL API and give the Importer Name <Name the Importer accordingly>
Now click on the *PLSQL API Call (+) Button as shown in the below screenshot.

→Provide the information as shown below.
API Type: PLSQL ProcedurePackage Name: <Package Name>Procedure/Function Name: <Procedure/Function to call once the data is loaded>API returns: FND Message Code
→Click on Apply and then click on submit button.

Next Post we will be discussing how to define the layout for the above Integrator.
No comments:
Post a Comment